This guide will help you to learn how to use a miter saw safely and properly.
Miter saw (also called chop saw) is a very handy tool for making several essential woodworking cuts. It is a popular tool among serious DIY enthusiasts and professionals alike for its precision and efficiency.

For making accurate straight-, beveled-, mitered-cuts and other general carpentry applications, miter saw is very convenient. This specialized tool definitely makes your furniture project go faster.
At first glance, using this versatile machine appears quite simple. But, to get excellent results, you need to know how to use this tool the right way.
All you need to do is, follow our guidelines to use your miter saw perfectly.
Read on!
How to Use a Miter Saw- Step by Step Guidelines
By following our step-by-step guidelines and with your confidence, you’ll be able to use your miter saw like a pro in no time.Let’s get into the details.
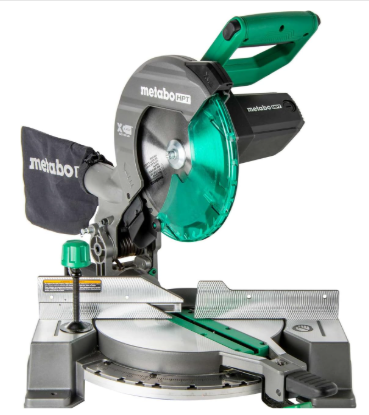
Metabo HPT 10-Inch Single Bevel Compound Miter Saw
Step 1: Safety First- Follow the Miter Saw Safety
Before you fire up any power tool like miter saw, you should think about safety. This machine demands awareness during every cut.
For safe use of this tool, you should follow the precautions and instructions included.
Here are a few of the most important precautions that you should employ to reduce the risk of injury:
- Firstly, take time to carefully read through the user manual and safety instructions to use the tool safely. If you have any confusion, ask a pro or contact the manufacturer.
- If you ever face any trouble with your saw and can’t find the manual anywhere around your work site or house, look online. Simply enter the model number of your saw into the browser. There will be an online version of the instruction manual.
- Secondly, wear safety glasses to protect your eyes. Use earplugs for hearing protection. Don’t forget to use a high-quality respirator for dust to protect your lungs. Avoid wearing loose clothing and jewelry that may catch on the blade.
- Keep in mind that using a miter saw is not a joke. It can be quite hazardous if you’re not wearing the necessary safety equipment.
- Be sure to focus on your work. Using this tool can get really dangerous if you lose focus.
- Thirdly, always perform regular maintenance of your saw. Poor maintenance leads to malfunction. Dull miter saw blade or broken parts can cause life-threatening injuries. To prevent this accident from happening, inspect your machine carefully, lubricate the components from time to time and replace the damaged parts. In this way, you won’t have to worry about malfunction and injury while operating it.
- Unplug the saw when not using it. Don’t forget to unplug it when you’re changing the blade.
- You shouldn’t operate the saw without its retractable blade guard in place.
- Always keep your fingers a minimum of 6-inch from the path of the blade. Some models have lines on the table to indicate the “hands-free zone.” If not, mark the danger zone with a marker to remind you to keep your finger/ hand at the safest distance from the blade.
- Never reach under the blade when it is rotating.
- Try to use a clamp to hold your workpiece in place.
- Before each cut, make sure you aren’t in an awkward position, and your hand is far from the blade as it rotates down.
- Before making a cut, allows the blade to reach its full speed.
- Finally, allow the blade to come to a complete stop at the end of each cut before you raise the head back up. This will prevent kickback.
Follow the above-mentioned miter saw safety tips and keep yourself safe while operating this tool.
Step 2: Setup and Tune-Up the Saw
Most miter saws are set to their factory settings right out of the box. But it may not stay that way. It may come out of alignment during shipment. It also may become misaligned during regular use if it unexpectedly hits a knot or during transportation from jobsite to jobsite. So, your new miter saw needs calibration or at least small tweaks before you put it to use.
First, make sure that the blade is square to the table and the fence is square to the blade to be sure your saw is cutting square. If not, readjust as needed.
Read the manual for the manufacturer’s instruction on fine-tuning blade alignment.
Second, rotate your saw’s turntable all the way-left or right- to make the saw easier to balance.
** It’s a good idea to set up your saw on a miter saw stand.
Step 3: Inspect and Replace the Stock Saw Blade
Most newly purchased miter saws come equipped with a blade with fewer teeth, which is better for cutting studs. But for DIY furniture projects, you might have to change it.
Blade with more teeth produces much cleaner cuts, making it ideal for cutting pieces for furniture projects.
Replace the stock blade if your project demands smooth and crisp cuts – exactly what you want for your DIY furniture projects.
For smooth and clean-cut, a sharp blade is important. Each time you use the saw to make a cut, residue or wood pitch may build up on the blade, which may dull or even corrode it. So, regular cleaning of the blade is important to keep it cutting at its best.
Step 4: Prep the Saw and Your Workpiece for Your Desired Cut
- Connect your saw to the power outlet and turn on the power switch.
- The lumber you purchase is never square. So, always cut off the ends (half an inch to an inch) of the workpiece to achieve a square end.
- Measure your cut and draw a straight line across the stock to be cut. Place your marked workpiece onto the saw and flush it against the fence at the back of the saw base. Place your miter saw clamp at least 6-inch from the blade and clamp the wood piece to prevent it from moving.
Any miter saw can make miter- and bevel-cut, depending on how the workpiece is placed onto the saw.
Understand The Difference Between a Bevel Cut and Miter Cut
- A miter cut simply means an angled cut made across the width or face of a workpiece. For making this cut with a miter saw, you need to change the horizontal angle of the cut from a 90-degree rip cut or cross-cut to a different angle across the top. You need to rotate the blade to the angle you want to cut, but your workpiece still lies on the base in the same position, no matter what miter angle you desire to cut.
- A bevel cut means an angled cut made through the thickness (from top to bottom) or on the workpiece’s edge or end. It allows the blade to tilt right and/or left from its 90-degree angle to the table surface. For this type of cut using a miter saw, the blade tilts vertically to make the bevel.
A compound miter saw is designed to perform both types of angles with a single cut. Thanks to its adjustment mechanism that swing the blade from right to left. Moreover, you can tilt the blade to cut at an angle instead of straight down.
How to Make a Miter Cut
- If you need to make a miter cut, unlock the miter gauge and squeeze the lock handle to your desired angle. A perpendicular cut will be set “zero” degree, then adjust accordingly.
- Once you set your desired angle, tighten the handle on the miter gauge.
- Before start cutting, lower the handle to check the point where the blade meets the wood. If you are satisfied, lift it back up.
- Keep one hand on your workpiece maintaining a safe distance, and raise the handle with the other hand.
- Engage the switch/ trigger and wait for the blade to reach full speed.
- Lower the handle slowly and steadily to bring the blade to the workpiece and start cutting through the wood until the cut is complete.
**Never apply too much downward pressure or force to the blade.
- Release the switch/ trigger when the blade has completed the cut and allow it to come to a complete stop before raising the handle. Maintain a firm grip until the blade stops completely.
How to Make a Bevel Cut by Using a Standard Miter Saw
- Place your marked workpiece on its edge (not flat) against the saw fence.
- Adjust the miter gauge to your desired angle. Make sure the blade meets the workpiece at the correct position. Then, clamp the wood piece.
- Engage the switch/ trigger and lower the handle to complete the cut.
How to Make a Bevel Cut by Using a Compound Miter Saw
- Place your marked lumber or workpiece flat or face-up onto the base and its edge. Push it against the saw fence.
- Leave the miter gauge at 0-degree and unlock the bevel gauge.
- Adjust the rear bevel gauge and tilt the blade arm at your desired angle to the surface of the table.
- Make necessary adjustments by using the front gauge to set the miter angle for the cut.
- Once adjusted as desired angle or bevel, lower the handle and complete the cut.
To make your woodworking project faster and highly productive, check out our miter saw tips and tricks.
Frequently Asked Questions (FAQ) — Miter Saw Basics & Pro Tips
Using a miter saw is easy once you learn the basics, but it’s normal to still have questions. This FAQ section answers the most common questions about safety, accuracy, and proper use, so you can feel confident every time you make a cut.
🛠️ 1. What’s the biggest safety rule with a miter saw?
Safety first: Always keep your hands well clear of the blade path—at least 6 inches away—while operating the saw.
- Wait for the blade to reach full speed before cutting.
- Allow the blade to completely stop before lifting it after a cut.
- Secure the workpiece firmly to the fence to prevent movement or kickback.
Quick Safety Checklist
| Step | What to Check |
|---|---|
| PPE | Eye, ear & dust protection |
| Workpiece | Clamped and tight against fence |
| Blade | Sharp & spinning at full speed |
| Hands | Out of the blade path |
📏 2. Why are my angle cuts not accurate?
Inaccurate miter or bevel cuts often stem from misaligned fence or gauge settings. A slight misalignment can skew even a “90° cut.” Users often adjust the detent/angle plate and square it to the blade body for precision.
Pro Tip:
- Regularly verify that the fence is square to the blade using a reliable square tool.
⚙️ 3. Can I cut metal or masonry with a miter saw?
No. Standard wood-cutting miter saws are designed specifically for wood cross-cuts and angled cuts. Cutting ferrous metals or masonry can damage the blade and cause unsafe kickback.
For metal cutting, use a metal-cutting blade and confirm your saw supports that material.
🪚 4. How do I prevent tear-out or rough edges?
Smooth, clean cuts come from a combination of:
- Sharp, appropriate blades — more teeth for finer cuts.
- Allowing the blade to gain full speed before cutting.
- Using zero-clearance inserts/jigs for small pieces.
📏 5. What’s the difference between a miter cut and a bevel cut?
Understanding these basics improves accuracy:
| Cut Type | Description | Adjustment Location |
|---|---|---|
| Miter Cut | Angled across the width of the board | Miter scale on base |
| Bevel Cut | Angled through thickness (tilting blade) | Bevel scale/lever |
| Compound Cut | Both miter + bevel in one motion | Both scales |
(Source: common tool definitions & guide context)
❓ 6. Is it safe to cut very small pieces on a miter saw?
Only if you have appropriate supports:
- Use sacrificial fences or clamps to secure small stock.
- Avoid freehand cutting tiny pieces that bring your hands close to the blade.
Too close = increased risk of kickback or injury.
🔧 7. How often should I calibrate my miter saw?
✔ Before first use
✔ Anytime you notice inaccurate angles or cuts
✔ After a drop or transport
Simple calibration (checking square and fence alignment) preserves cut accuracy and safety.
📐 8. What if the saw blade touches the fence during a bevel cut?
This is often due to improper fence adjustment. Before making bevel cuts, adjust or remove fence sections that might obstruct the blade path.
Not doing so can damage the fence or blade.
🧰 9. Can I cut non-wood materials like aluminum or PVC?
You can with:
- The correct blade type (e.g., non-ferrous blade)
- Proper feed rate (no forcing the cut)
Users report success with aluminum when cutting slowly and safely, but always use PPE and verify blade compatibility first.
🧹 10. How do I manage dust and debris effectively?
Control sawdust by:
- Using a dust port + shop vacuum
- Channeling dust to the floor with attachments like elbows or dedicated shrouds.
This not only keeps your workspace clean but also improves visibility and safety.
Conclusion
That’s it!
Thank you for stopping by to check out our guide on how to use a miter saw.
Hopefully, you’ve found our step-by-step guidelines helpful to operate this versatile machine.
Make working on your next woodworking projects an enjoyable experience!

I’m Ivan D. Mitchell. I’m the Chief Engineer, Manufacturing Engineering Tool and Launch, specialising in automotive equipment design and build which meets World Class Manufacturing methodology. I have 15 years of work experience as a Tooling Specialist on some of the leading automotive manufacturing companies. When I launched this site, I wanted to create a platform where you’ll get everything about tools in one place. I also wanted to share my experience in the tool industry. I’ll do my best to share the information you need to truly make your tool using experience better. I hope you find our guides, reviews, information HELPFUL. If you have any inquiries, I’m always here to help you.