Want to weld with your stick welding machine like a Pro? Want to develop your arc welding technique? Then this guide will be useful to you.

Here I’ll share with you 8 stick welding tips and tricks that will help you to improve your chances of creating excellent stick welding results from the beginning.
Stick welding (also known as shielded metal arc welding or SMAW) is a very dependable and robust welding process. It is one of the oldest forms of welding that is still in use today.
Why?
This process works fantastically in the outdoors, rain, mud, ditches and windy conditions. Conveniently, it welds on lightly rusted, oily or dirty materials. What’s more, it can weld thicker metals.
In summary, in the hands of an experienced welder, this welding process has many advantages over MIG and TIG welding. The Stick welding process allows you to weld different metals simply by changing the welding rod.
However, there is a certain amount of skill necessary to create a good stick weld. Unfortunately, beginners or those who don’t weld every day may struggle with this process. It requires focus, patience, and technique to master. The good news is, if you can master this arc welding process, you won’t have any problem learning other processes.
Sounds great?
This write-up highlights some important arc welding techniques for beginners and pros that will guide you to make better welds.
So, without further ado, let’s discover those tips.
Table of Contents
8 Stick Welding Tips and Tricks for High-Quality Welds
Following are 8 practical techniques for using a stick welding machine that every stick welder operator should focus on for producing high-quality stick welds:
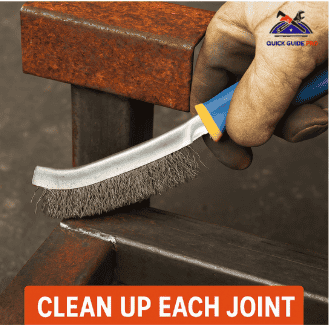
1. Clean Up Each Joint Before Welding
Before welding a joint, remove excessive rust, oil, moisture, paint, and grease from the joint/ metal surface. Eliminating these issues before welding will help you achieve your desired weld travel speed, avoid porosity, and thus increase the welding performance.
If it’s not possible to remove these culprits, use an electrode that is designed to penetrate them. Fleetweld 35 (AWS E6011) and Fleetweld 5P (AWS E6010) electrodes are perfect for this job type. They can penetrate through these contaminants and deep into the base metal.
Don’t forget to keep your work clamp clean because an excellent electrical connection is essential to maintain arc quality.
Keep travel speed slow to give gas bubbles the required time to boil molten weld out before it freezes. Thus, it’ll improve the overall quality of your weld.
2. Starting The Arc by Scratching Method or Tapping Technique

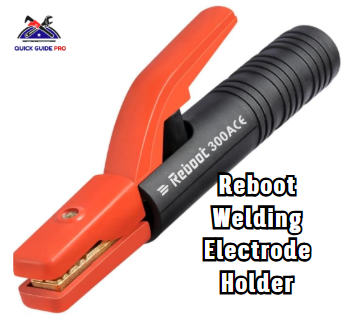
Insert the electrode or welding rod into your electrode holder. Scratch the welding rod on your base metal, and then bring the rod back to start welding.
You can also start the arc by tapping. For this, hold the rod at a 90-degree angle to the base metal. Then lift it to about the distance of the diameter of the rod. For example, if you have a 1/8-inch welding rod, keep the distance 1/8-inch between the rod tip and the work surface.
3. Set Your Current Setting at The Right Level to Get Smooth Welds and Good Penetration
Observe the amount of build-up and keep in mind that it should never be more than 1/16-inch thick. Also, watch the edges of your weld and observe how the weld puddle flows to either side of your welding rod. Adjust it slightly.
You can control the weld build-up, the edges of the puddle, and your base metal penetration by adjusting the amp settings. The Amp setting of your machine mainly controls the heat. The amp setting is what regulates how much current you’re sending through the welding rod.
If your amp setting is very low, the weld puddle or weld pool will form under the end of the welding rod.
On the other hand, by increasing the amps, you can generate more heat to create a weld puddle. If you increase the amp, your weld will spread out more and penetrate more in-depth into the base metal.
Keep in mind that an excellent quality welding puddle flows nicely out from both edges of the welding rod, but not too much. If you increase the heat too much, you’ll lose control of your puddle. Adjust the amp setting to the point where you find that you’re getting the best quality welds and good penetration.
In other words, keep the amperage setting as high as possible but not to the point where it’ll be difficult to control the flow of the weld puddle.
4. Always Select Steel with Minimal Sulfur and Silicon Content to avoid cracks.
Steels with a high silicon or sulfur content or low-alloy steel tend to crack while you’re welding.
Choose AISI-SAE 1015 and 1025 steels that have minimal sulfur and silicon content (sulfur below 0.35 and silicon content below 0.1%). With these steels, you can weld faster with less tendency to crack.
When welding on metal with significant temperature issues, there are greater effects on the materials. For example, if the metal is cold, you should preheat it before starting welding. When pre-heating a freezing metal, you may notice moisture build-up on it. Continue heating the metal until the moisture dries.
For arc welding high-carbon steel or harder metal, preheat it, as this type of steel may crack when it cools.
5. Choose The Correct Size Electrode for The Metal
Larger electrode welds at a higher current means the deposit rates will be higher. So, use the larger size electrode for good welding results. However, on root passes and sheet metals, the electrode size might be limited.
Generally, the 3/16-inch electrode is the maximum practical size for vertical or overhead welding. On the other hand, for a low hydrogen environment, choose a 5/32-inch electrode.
Again, the joint’s dimensions sometimes limit the size of the electrode that can fit into the joint.
6. Choose an Appropriate Joint Position or Rod Angle
The joint position affects the welding speeds and quality of your finished weld. The rod angle on the base determines how fast the metal will heat up. A sufficient bevel is essential for superior penetration and bead shape.
If you’re welding on thinner materials, hold your welding rod at a perpendicular angle. It’ll help the molten weld to spread quickly, which lets you weld at a faster speed.
When you weld at a perpendicular angle, less filler metal will deposit. That means you’ll have a flatter bead.
An angle with your welding rod, means you put less heat on the base metal. As a result, it’ll slow your welding travel speed and produce more build-up (a crowned bead).
However, too much angle won’t produce enough heat to the base metal and produce a thinner weld puddle. The bead may stack, and you’ll lose control over the weld puddle.
If you’re welding on 10 to 18-gauge metal sheets, position the workpiece on a 45-degree downhill angle to achieve the best speeds. But don’t exceed 75 degrees to avoid over-welding.
When welding steel plates that are at least 3/16” thick or greater, position the workpiece flat to make the stick welding process easier to your advantage. A level position is recommended for low-alloy plates and high-carbon steel.
While stick welding, it’s important to keep the weld puddle of uniform size throughout the process. In fact, it doesn’t matter a lot that you’re angling the welding rod to build up the deposit. Instead, what’s important- you have to maintain the puddle size with the weld travel speed.
Controlling and changing your weld rod angle requires a little bit of practice. However, it’s essential to stay relaxed to get better and faster results.
7. Add some filler metal to your weld pool before taking it out and back over the weld.
When you start producing a weld puddle, make sure you keep the arc gap steady to allow the molten metal to spread out correctly. Avoid undercutting or excessive spatter by filling in and along the edges of your metal.
I recommend adding some filler materials to your weld pool before taking it out. Thus, you can achieve good arc welding.
During welding, focus on what is occurring, as while welding, you have to control how much filler metal you’ll use and maintain the heat generated.
What you should not do is look directly at the light or the rod. Instead, what you have to do is focus on the weld puddle.
8. Follow The Perfect Travel Speed
If you’ve implemented all of the techniques mentioned above, but are still getting ineffective, ugly results, it is time to look at your weld travel speed.
Welding travel speed determines how much molten metal or weld puddle will be deposited onto your workpiece. It also determines how much heat is dumped into it.
Watch the ridge (where the molten metal solidifies) and welding puddles. A too slow travel speed will produce a wide and flat bead with shallow penetration that will also deposit too much metal. On the other hand, a too fast travel speed produces thin and ropey welds.
To gain a desirable travel speed in most applications, try to keep your arc on the leading edge of the puddle without outrunning it.
Final Thoughts: Practical Stick Welding Tips and Tricks
So there you have it, eight stick welding tips and tricks that work for me.
Hope, by applying these techniques listed above, you will also be well on your way to becoming a master of the arc welding process.
However, what is most important is practice, practice, and practice. And don’t get tense when welding.
Good luck on your next stick welding project!

I’m Ivan D. Mitchell. I’m the Chief Engineer, Manufacturing Engineering Tool and Launch, specialising in automotive equipment design and build which meets World Class Manufacturing methodology. I have 15 years of work experience as a Tooling Specialist on some of the leading automotive manufacturing companies. When I launched this site, I wanted to create a platform where you’ll get everything about tools in one place. I also wanted to share my experience in the tool industry. I’ll do my best to share the information you need to truly make your tool using experience better. I hope you find our guides, reviews, information HELPFUL. If you have any inquiries, I’m always here to help you.